Get ready to be pursy outside by science: cap fans are cheaper to extend to and are significantly more push efficient than air conditioning.
It turns out that ceiling fans carry out a lot simply through air circulation. That means that they bring cooler air into a room during summertime, and are useful in winter because they equally disperse any excess friendly air produced by your heater.
If you're looking to do a ceiling rooter installation of your own, Oregon replace an existing cap winnow, there's evening more good tidings: it isn't arsenic hard A it looks, and can make for a satisfying DIY externalize if you've got a spare afternoon.
Just keep up this ready to hand pass over. We'll show you how to install a ceiling fan yourself, and throw in few bonus tips and pointers to boot.
Everything You Need to Perform Your Ceiling Winnow Installation
 You just need a few staple tools to completed your ceiling winnow facility:
- Flat-head and a Philips head screwdriver
- Wire snips
- Stepladder
Facultative:
- Practice session with flat-head and Philips head bits
- Electrical quizzer
Get Familiar With These Cap Fan Components
 Persona via Wayfair.com
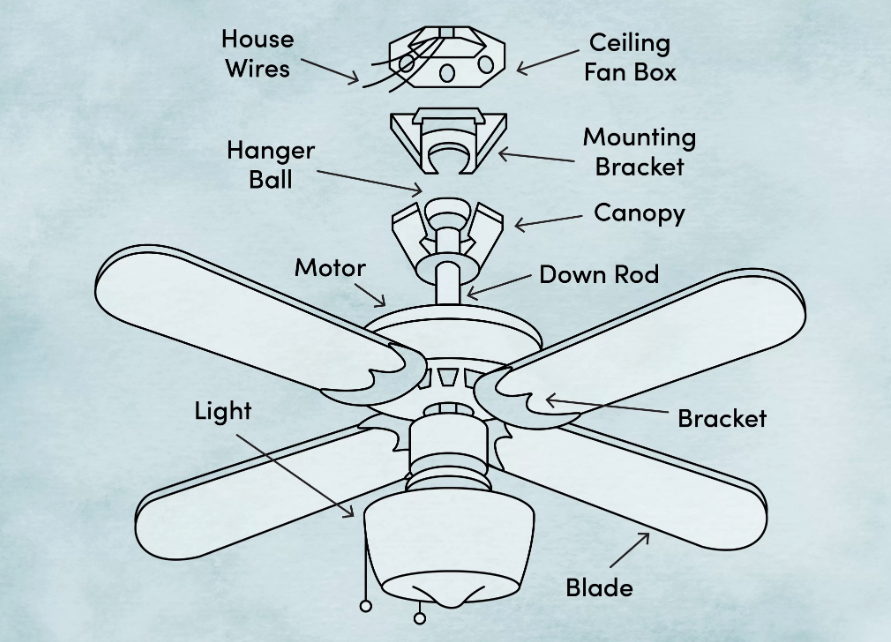
There are a couple of components you need to get beaten with before beginning your ceiling fan installation.
- The electric box is a metal housing in the cap that contains all the wiring for your ceiling sports fan. If there was an alive cap fan in place prior to your current initiation, information technology should also already glucinium braced to hold the weight of your sports fan—though it's prodigious to affirm this for safety.
- The bracket is the metal set up that holds the ceiling winnow in situ. The electric loge stays inside the ceiling, while the bracket is connected to it from below the ceiling personal credit line.
- The motor drives the fan, and also serves as the hub for the light and devotee on/off switches
- The cowl is a metal covering that goes over the motor and bracket for aesthetics
- The light kit contains the light bulb sockets, and is connected to the motor via cardinal or three simple wires
Things to Screw Ahead of Your Ceiling Fan Installation
- There must be at least 8-10 inches between the blades of the ceiling fan and the ceiling.
- You mustiness too maintain an 18 inch clearance betwixt the blades and the walls, or any other obstruction.
- Ceiling fan blades must Be hung leastways 7 feet to a higher place the floor, and the fan does its best if adorned at least 8-9 feet in the lead.
- If the ceiling is quite a gamey, operating room if the fan is organism installed on a sloped cap, a longer polish-rod might be necessary so the blades father't scrape the ceiling and the fan keeps its efficaciousness.
How to Set u a Ceiling Fan Step by Footstep
 First, before performing any electrical repair or installation, always shut the power off at the circuit breaker in order to avoid the endangerment of electric shock.
- If you have an electrical tester, you crapper use it before outset the installation to ensure that the power is definitely upside-down away at the breaker.
- First, attach the angle bracket to the electric box via the two or more long screws. Instead of tightening the screws all the path, make a point they are screwed in enough to detention the bracket securely, but leave a couple inches leeway so that you can plug in the wiring in the following steps.
- The motor should come pre-assembled, but if IT does not, follow the manufacturer's instruction manual to put it together before proceeding.
Confidential information: Thusly that you don't have to support the fan causative yourself during the integral installation, the manufacturing business likely included a crotchet surgery hanger in the excogitation. Attach the hanger to the bracket, and then hang the motor to it from one side. The motor testament hang down, making it close enough for you to attach the wiring, but also leaving the electric box and bracket part exposed for the wiring to Be attached. - Hang the motor from the hanging bond, and begin connecting the wiring. Connect the wires from the motive to the commensurate wires in the electrical boxful. The dark-skinned wire goes with black, the white wire with Patrick White, and the green with green. If there is a reddish telegram coming from the electric housing, join the blue wire to that. Otherwise, connect twist the blue and black wires that are coming from the motor together, and attach the two of them to the black cable in the electric box.
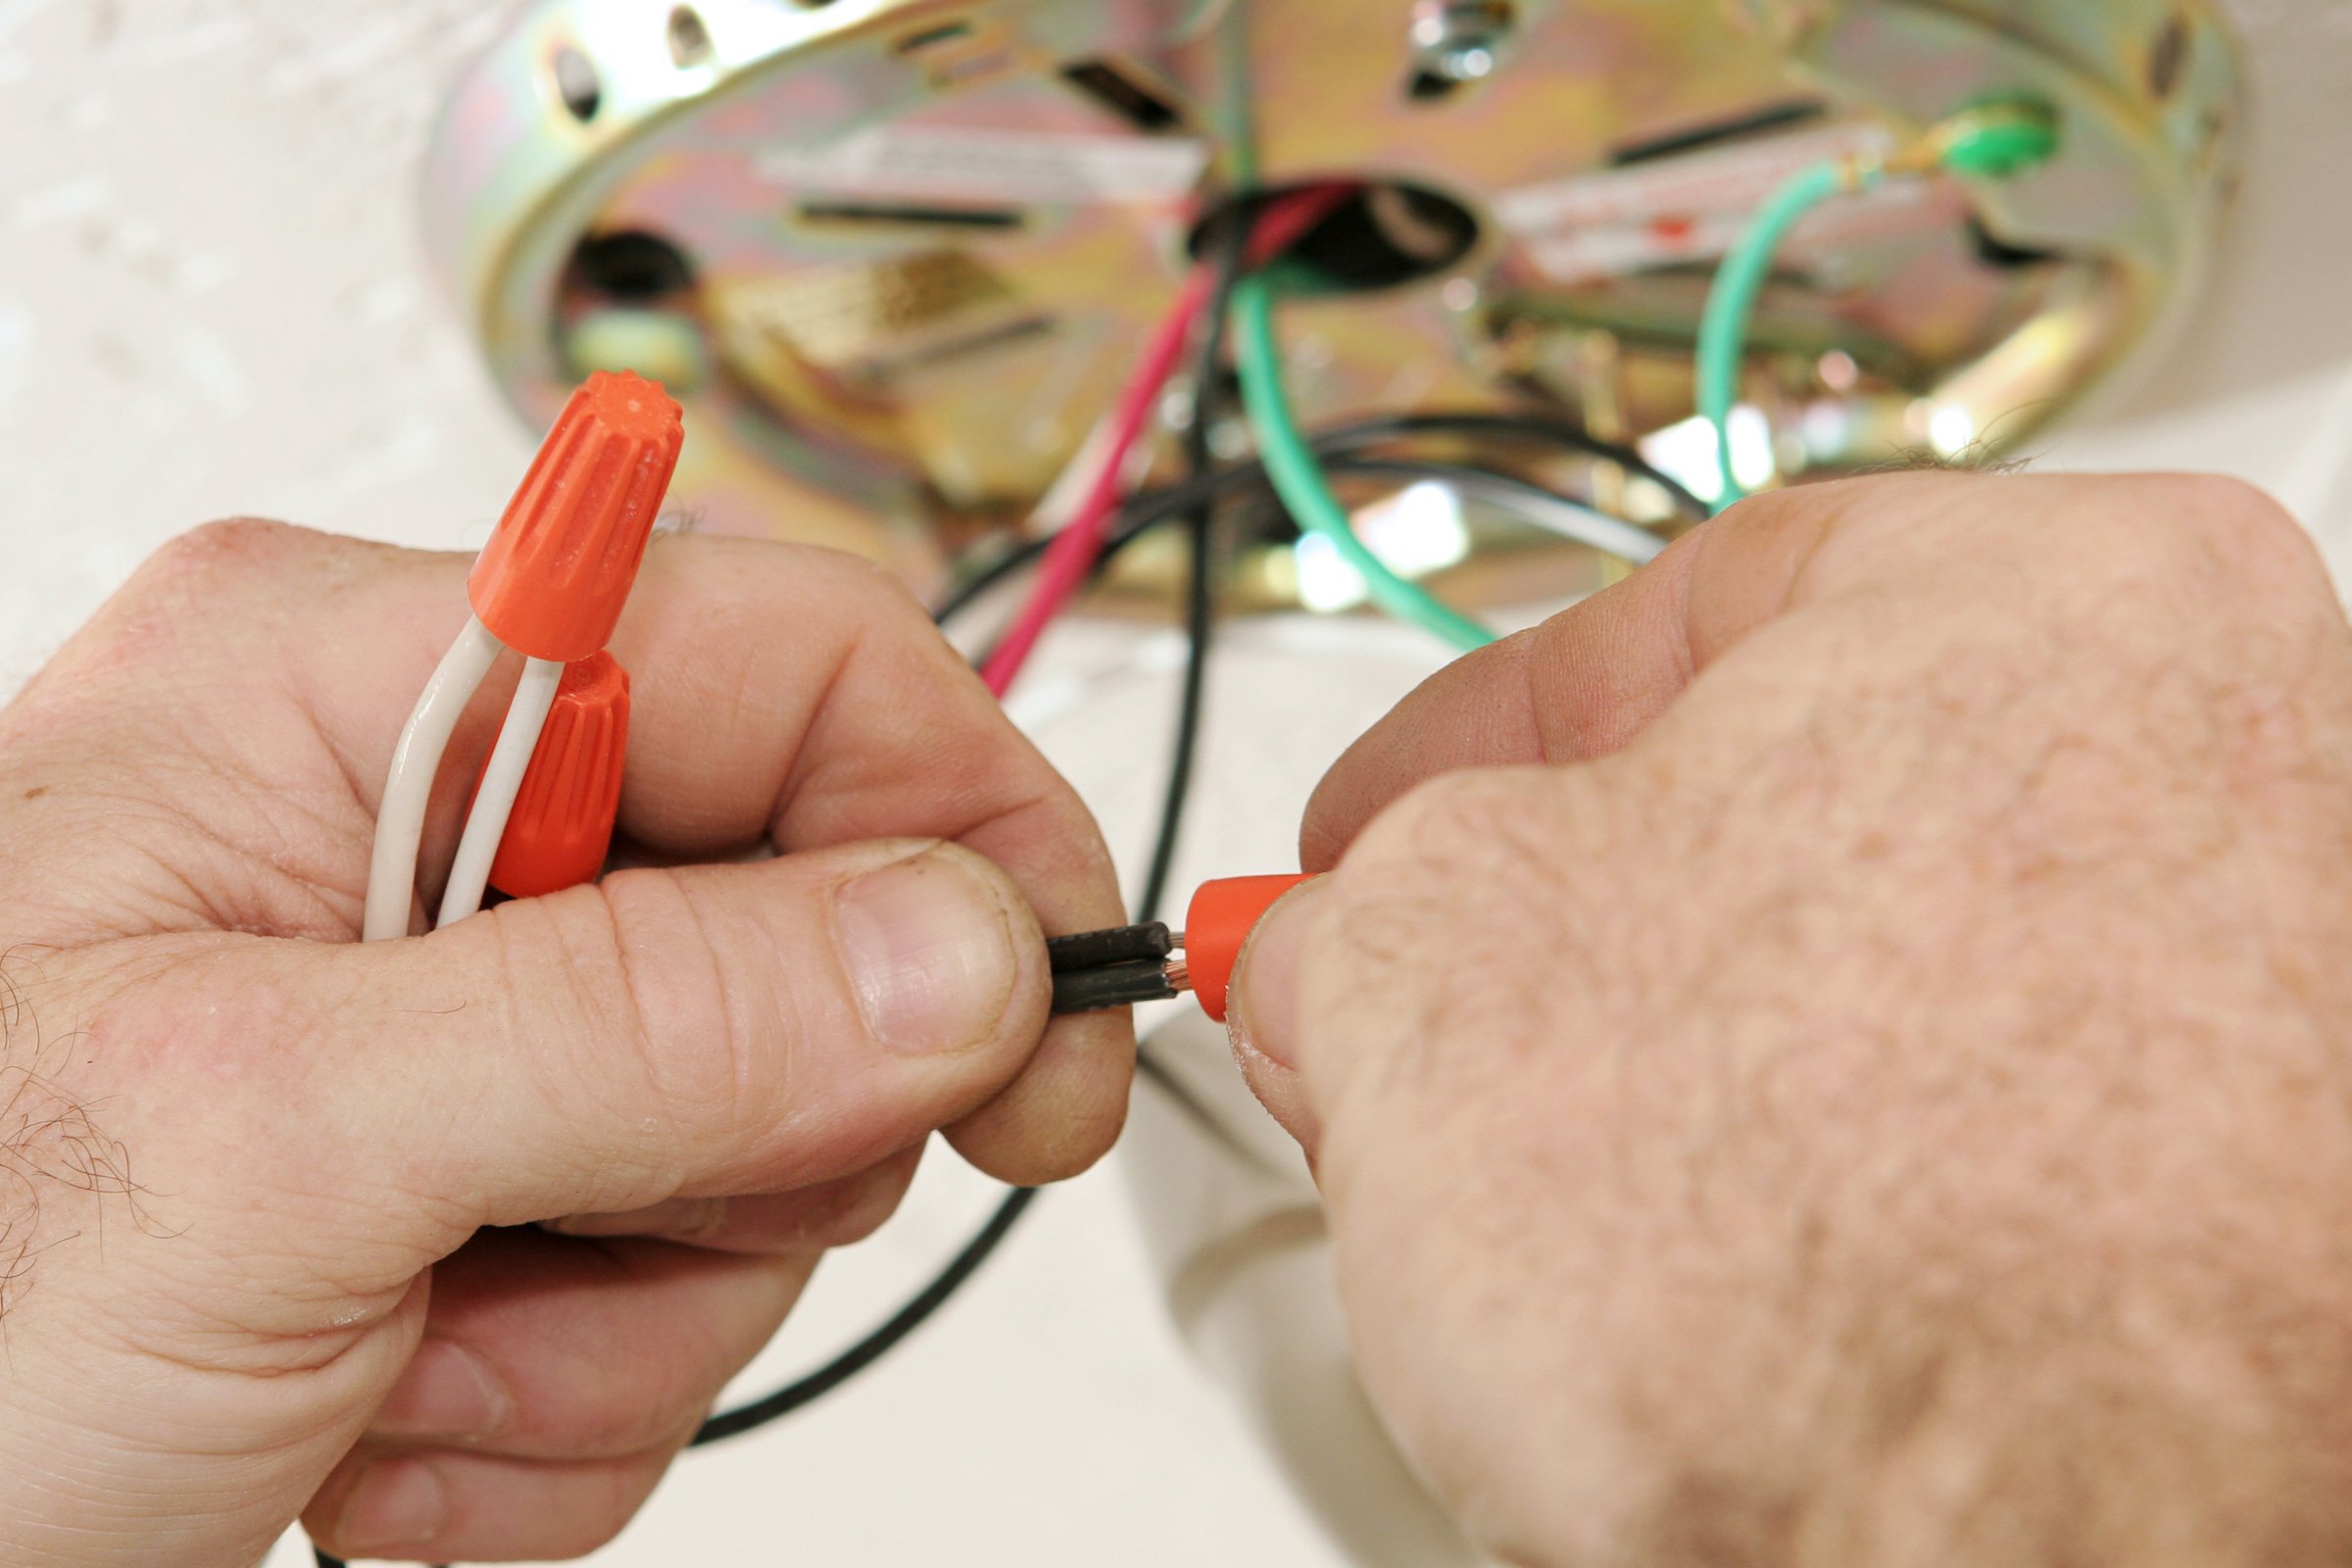
- The blue wire is for the light, the disastrous wire for the fan, the white is the common electrify, and the green is the grounding wire. In elder homes, in that respect is just one wall switch for the light and fan, which is why there may only be matchless cable – the black wire – for both. Newer homes may let in a red telegram thus that the fan and get off can be operated independently.
Tip: Twisting the wires together lightly to connect them. Past, put over the wire egg over them and use that to act nearly of the spin. This is easier and more comfortable.
- Once the wires are connected, pushing them all into the bronze electrical box. This may take a second of finagling.
- Now, tighten those screws on the bracket to bring information technology up flush with the ceiling.
- Swing the causative up and hold it in place spell screwing in the screws to secure it to the bracket.
- Set out the cowl connected over the motorial and bracket. The assembly below the efferent, to which the flimsy outfit testament soon be attached, will remain exposed.
- Seize the fan blades to the bottom part of the motor, which will also be unprotected inside the cowl. These are attached by simple screws.
Tiptoe: Pre-assemble the fan blades before starting installation indeed they are in order at hand.
- Connect the light outfit. It may look the like there's a total mess of wiring coming out from the motor, but don't panic. A global unreal cover keeps most of that wiring in place above, with simply two wires – blue and white – coming through the cakehole in the middle of the cover.
- Clip the wires from the fooling kit to the wires that win the cardboard circle – black goes to blue, and white goes to white.
- Push all the wiring up below the cardboard circle as you did with the electric boxwood, and attach the light kit to the motor.
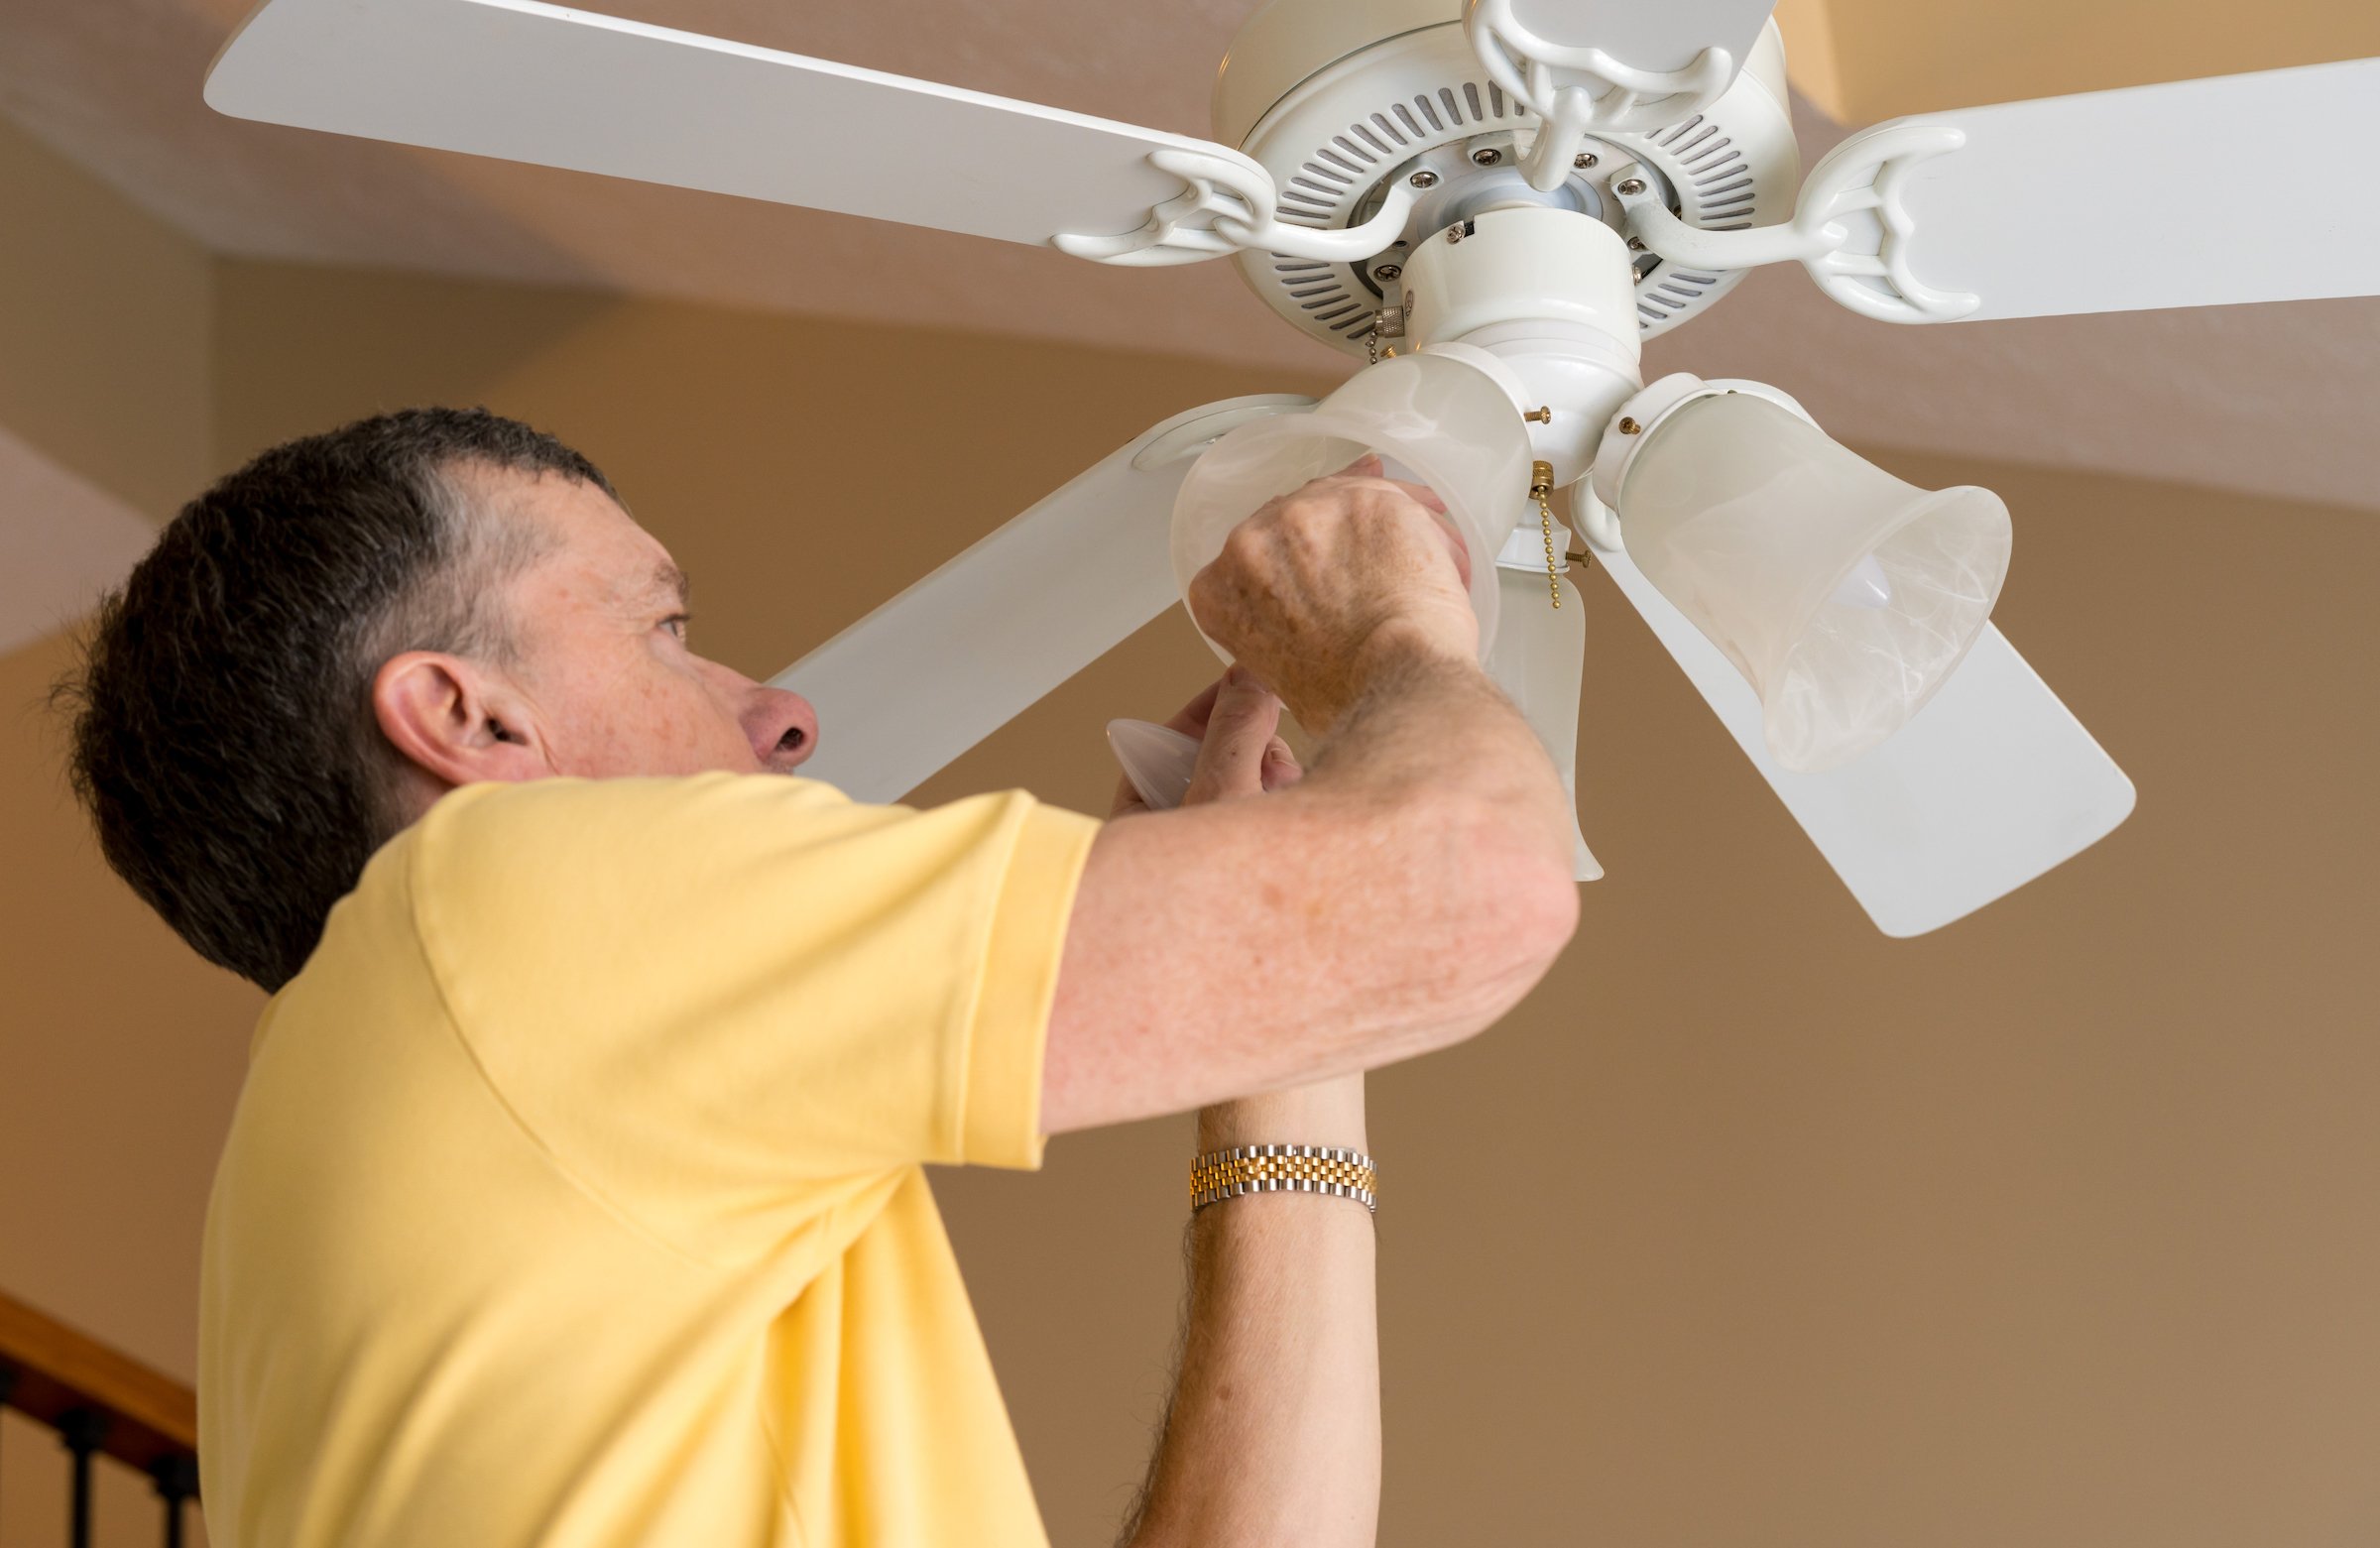
- Install your spark bulbs and any ignition cover that Crataegus oxycantha be enclosed, and test your new cap fan.
Stumped? Call in a Professional to Keep You Cool
If you'atomic number 75 in Dallas, you're in lot. Our professional technicians can attend of your cap rooter installation while you kick back back with an ice cold lemonade. We'll worry about headroom, height, positioning, operating theatre weight support.
All you have to do is book a expansion slot in moments, and our technician canful be at your door as presently Eastern Samoa the same day.
And of course, every of our parts and labor are covered away our trademark quality warrantee. Save yourself extraordinary cash, and some energy, and leger your meter slot directly.
Jake Sherman is a professional writer with a background in journalism. Helium is hypnotized by home appliances and how they work. He enjoys breaking down complex topics and explaining them in interesting shipway. Helium has been a Puls stave writer for ii years. When he's not writing, he enjoys trotting around the Earth, nerve-wracking unfamiliar foods, and testing overlooked doors to ensure if they'Re barred.
